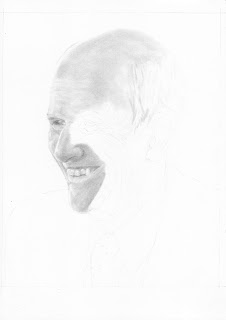
From the outset, this was the whole idea behind this blog - to allow people to see the progress of the portrait they have asked to be drawn.
It also gives me a chance to talk about my thinking and my drawing process.
To start with I draw the rectangle that frames the picture.
Although it seems insignificant, this rectangle is THE most important component of completing the outline.
On the reference photo this frame is the edge of the photo.
It is how I measure various points of the outline, with both a vertical and horizontal measurement.
Each point measured is then joined to another point, just like a dot-to-dot, slowly forming the outline.
The photo below may not be very clear as it is a light outline done lightly with a HB pacer.
Once I get the basic outline done I then work at the major facial features.
Next, each section of shading is also outlined - each light and dark area.
It is at this stage that the picture looks slightly freaky, as it isn't clear what areas will with be dark or light. It almost has that negative image thing happening.
Once I'm completely (and I mean completely) satisfied with the outline, it is only then that I begin the shading. If the outline is correct, it doesn't matter how well I shade, it will not resemble the person I'm drawing.
At this stage I usually breathe a sigh of relief because I realise that it will all turn out okay - yes, the finished outline stage freaks me out that much!
From here we just continue on, usually working from top to bottom, left to right.
This particular picture contains the darkest skin tones that I've ever worked with, and it's pushing my limits on what I believe my little HB pacer can do!

At this stage I'm building up the graphite, layer upon layer, getting just the right tone I'm after.
This can take time, and is often deceiving. I'm sure I'll go over this section a number of times more before I'm completely happy with it.
Okay... back to the drawing board I go!
 Well, I'm finished.
 I spent about an hour or two working on this upside down. You would be suprised what you see when looking upside down, that for some reason you never notice normally.


